About as small as one can get in 1/64th scale

This page is reserved for a full post about Tresparrett Wharf

But here are some pictures in the meantime…   (Please scroll down for several completed entries.)

IMG_20160129_092558

The box that constrains the size of the layout. Its internal measurements are 740mm long, 210mm wide and 140mm deep.  This allows two boards 700mm x 200mm x 140mm to be accommodated.

IMG_20160115_113633

Waiting for the train…. is a LSWR layout allowed to sit on a GWR seat?

IMG_20160115_114710

… and safely stowed overhead

IMG_20160117_101443

…. And a rather poor quality picture at the St Albans show in January 2016.

This layout is booked for exhibition at Uckfield in October, Newport IoW in November and Aylesbury RailEx in May 2017.

A layout for carrying on public transport

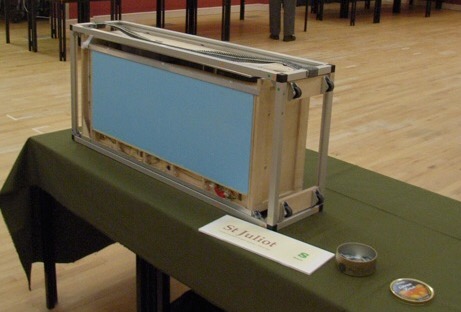
St Juliot – 1890 to 1900 


Travelling with St Juliot

image

St Juliot is the result of several factors. These include:- the availability new 1/64th Scale track components, the wish to experiment with lightweight extruded polystyrene baseboards, the desire to attend exhibitions without travelling by car, and the need for a short-term project that could be completed while working on a larger layout.

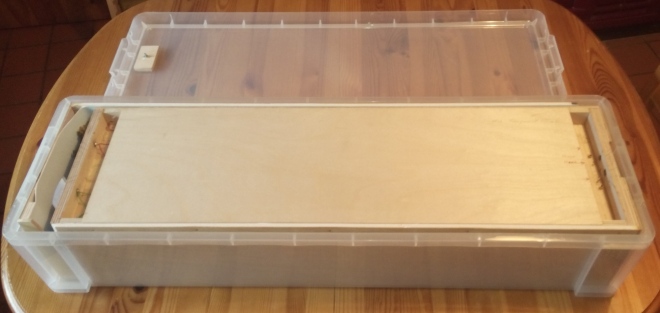
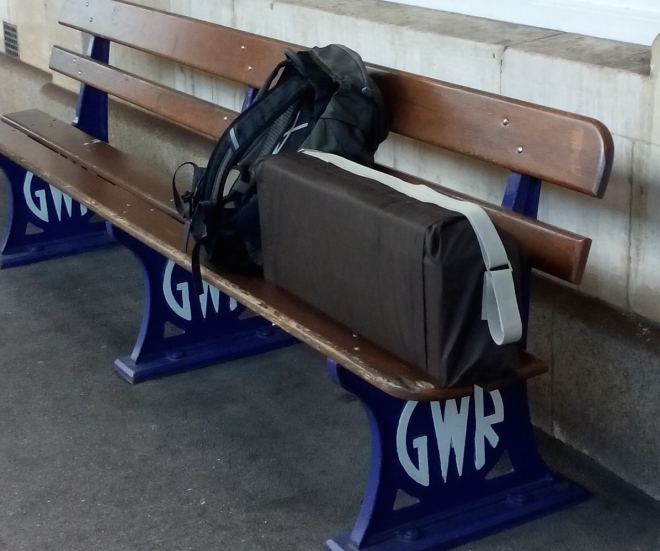
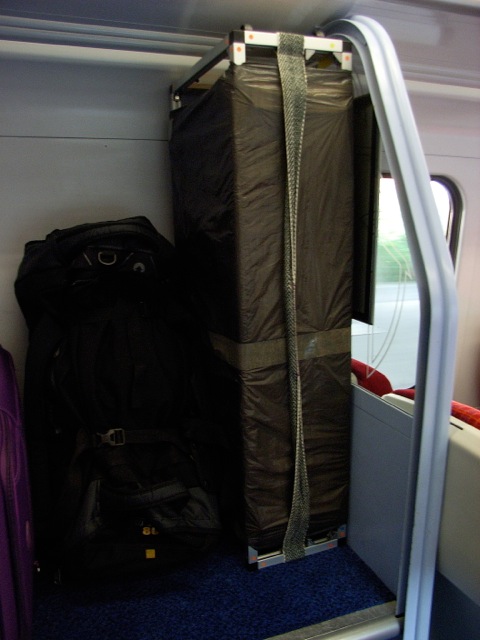
The layout packs down to make a case that will fit on most overhead racks on a train. With another bag to carry the small collection of rolling stock required, it is a case of “have small layout – can travel by train”!  Needless to say I have become rather knowledge about the best locations for reserving seats on the various trains that operate out of Exeter.

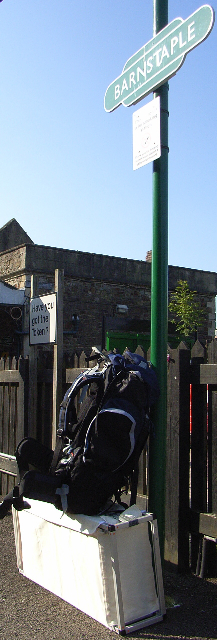
The picture above shows the layout in its carrying frame with fabric cover waiting to board the train to Barnstaple. No space problems here on a early Saturday morning service. The driver was much assumed, being a member of the Exe MRS.

image

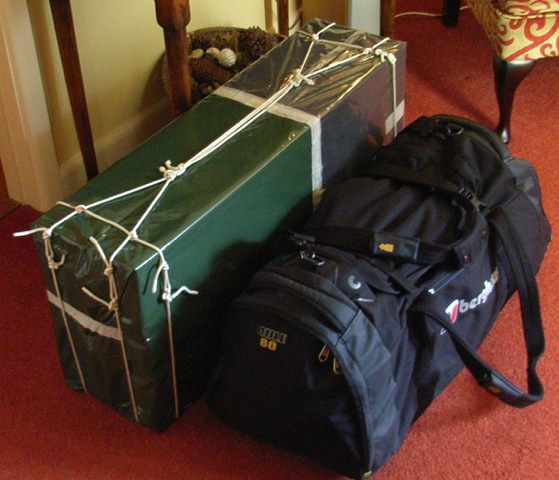
…. And here on the return journey with the backpack that is used to carry all the bits that are not in the layout crate.

image

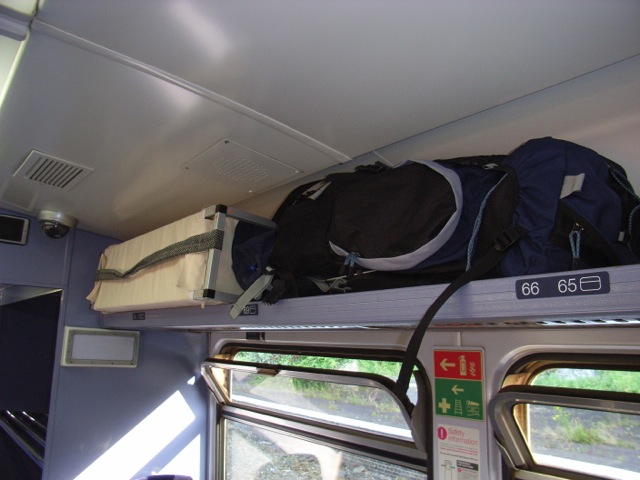
The return service was rather more crowded, but they was plenty of space on the long and deep side racks.

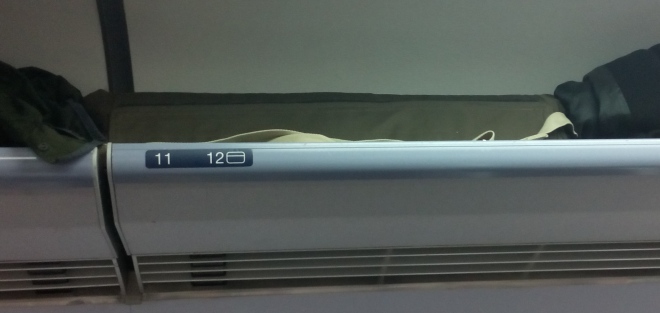
It is surprising  just how much variation there is in the size, especially the depth of the overhead racks on British trains.  The advent of air conditioning has often caused the lowering of ceilings and the fancy cross-sections of racks often make them less efficient in their task of carrying luggage.  This flat self of BR origin is still one of the best… Good old BR!

image

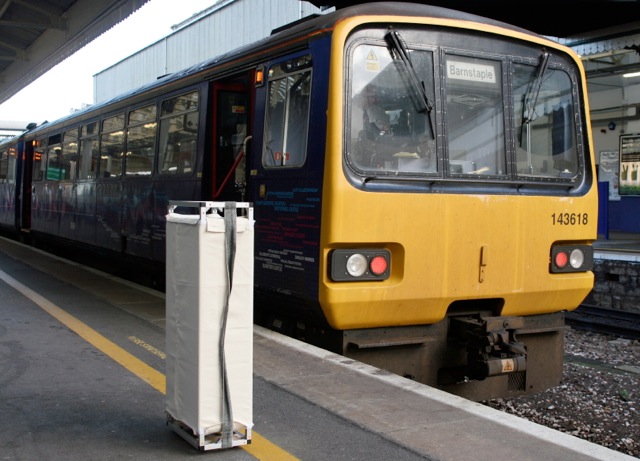
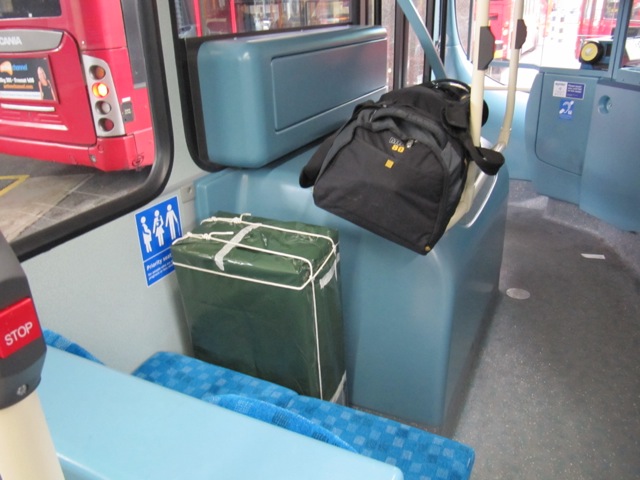
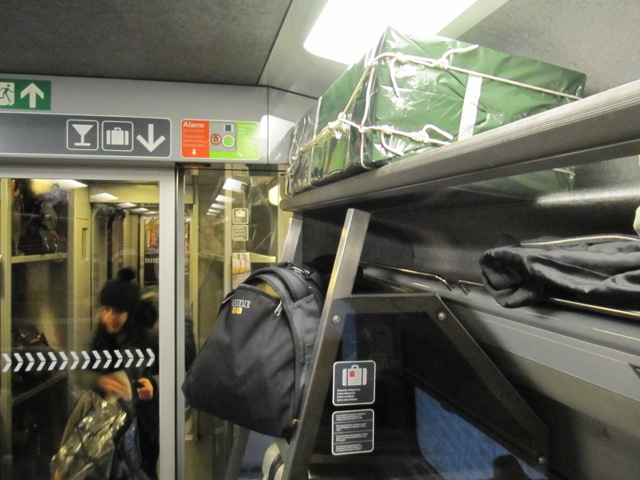
The Class 158s on the Waterloo route from Exeter have the advantage of the racks originally designed to have shatters, running in the slot to the right, for the secure carriage of mail bags.  This makes a good space for the layout, on this journey to Uckfield.  I had to move nine other pieces of luggage in preparation for getting off the train at Clapham Junction!

image

Here is the layout on the tables provided by the venue at Uckfield after the removal of much needed plastic bin-bag covers… It was forecast to be, and indeed was, a very wet weekend.

image

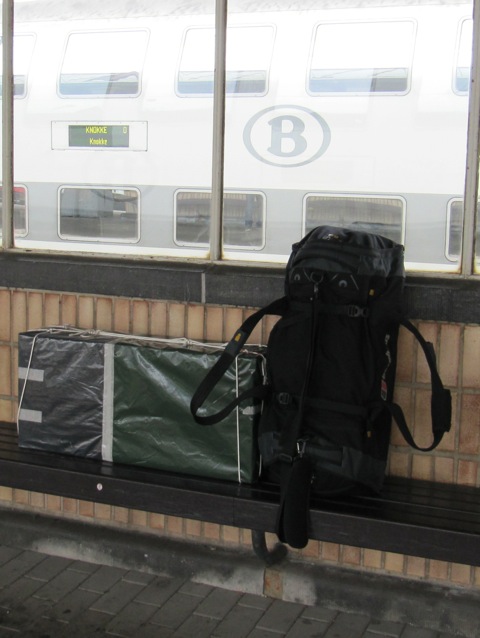
🇳🇱 🛄 A rather more robust cover was made for travelling to Utrecht. The heavy duty plastic sheet disabled the carrying strap so a net of thin rope was made to provide a handle.  The sports bag, which can be warn as a backpack, even has arrows on the straps to help keep it the right way up… It is packed with the heavy stuff at one end.

This journey was badly disrupted by the loss of the railway to the west of Exeter at Dawlish, the emergency service to Paddington not being able to get me to St Pancras in time for my booked Eurostar.  With some disruption on the Waterloo route it was decided to travel to stay with my daughter in south west London.

image

This meant a ride on a bus from Waterloo to St Pancras at the end of the morning peak.  The forth bus had space for me, as it was travelling close behind the third which, like one and two had standing room only!

image

There was plenty of space on the end of coach racks on the Eurostar.  Having been given a seat in the middle of the coach, I went to the customer service desk at St Pancras and relocated my seat to the end of the coach which allowed me to sit close to the layout.  The only problem was that as the seat was also changed for my return journey, the amended ticket would not work in the gate line at Brussels Midi.

image

Changeing trains at Brussels Midi and the connection to Rotterdam.

image

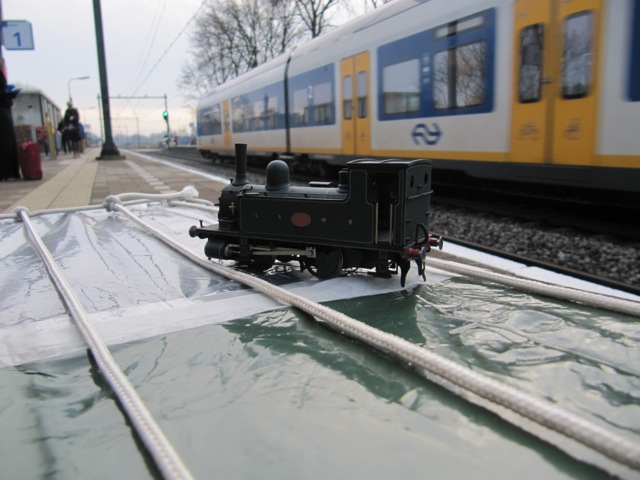
Bunnik station, near Utrecht, at the start of the return journey with the B4 sitting on the layout and modern, low floored Dutch commenter train in the background.

What is in the box?  Building the layout.

image

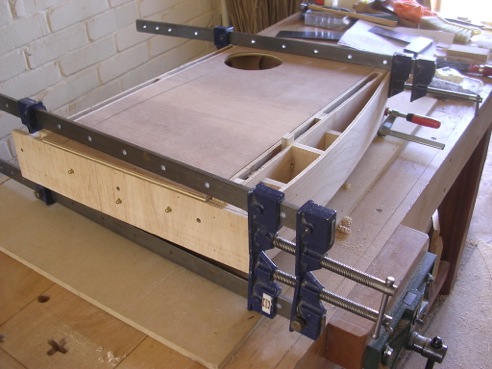
The baseboards are made from a mixture of extruded polystyrene and 4mm plywood.

image

The extruded polystyrene forms the flat surface which is framed with ply, the back edge being made as an inverted channel that carries the wiring and provides space for the switches which also act as point levers.

image

The front piece of plywood is profiled ready for the scenery and includes a full height ‘horn’ at the outer end which strengthens the end panel.  Likewise the back, eventually to be painted as the sky, is part of the baseboard structure. Once the end is in place the boards form ‘hod’ shapes that fit over each other to make a box.

image

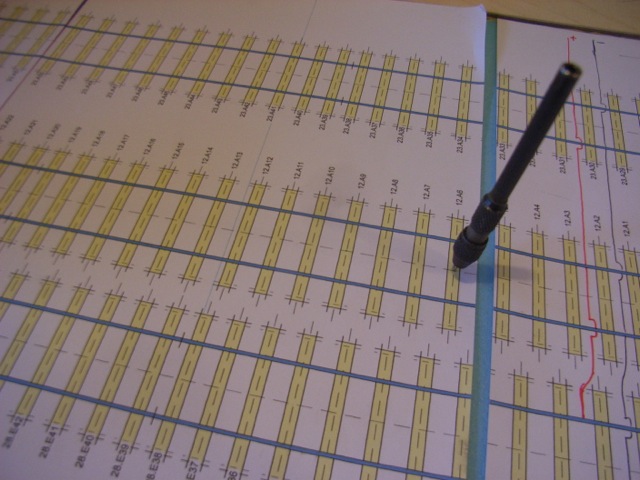
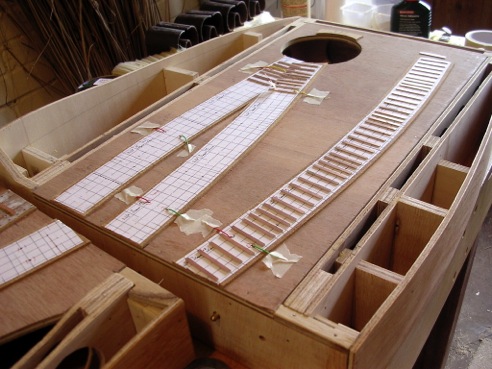
My modelling colleague Simon Dunkley kindly produced a Templot plan of the layout which was used prick through to the extruded polystyrene before glueing down the cork.

image

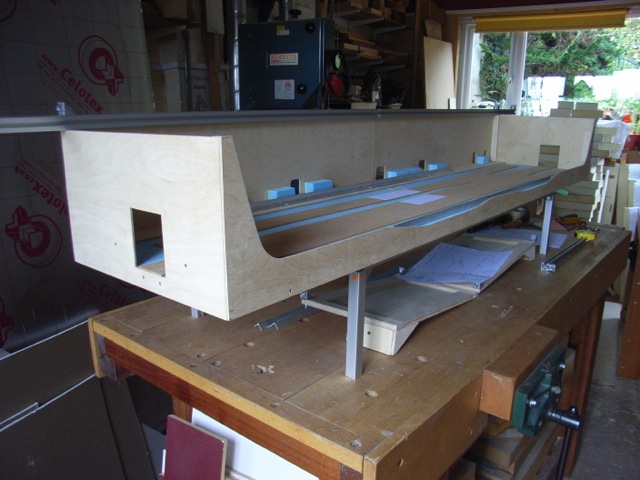
The initial setup without track.  The pieces of wood under the layout are end boards from the original box design, before the aluminium Rexroth™ crate was made.  These have been dispensed with in later designs by building more robust ends that do the job of the end boards.  This saves both weight and space!  It also allows quicker buildup and knockdown at exhibitions.  Indeed it makes for a more elegant design all round

image

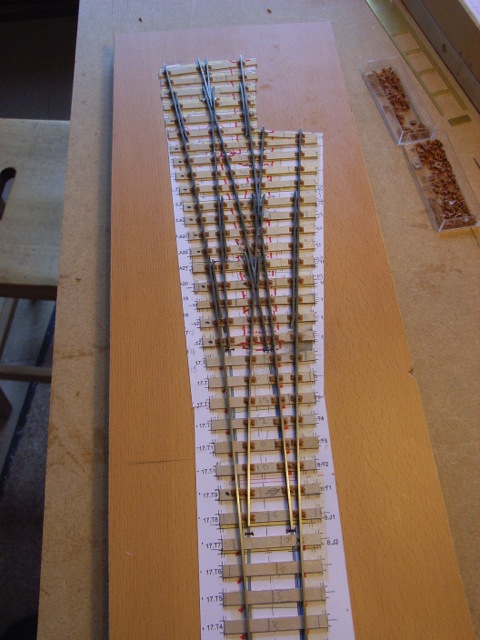
The three-way point being made off the baseboard…

image

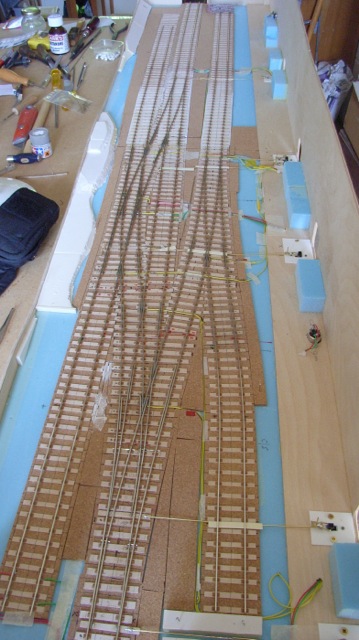
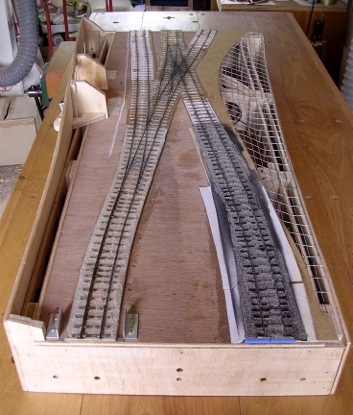
… And added to the layout with all the other track…

image

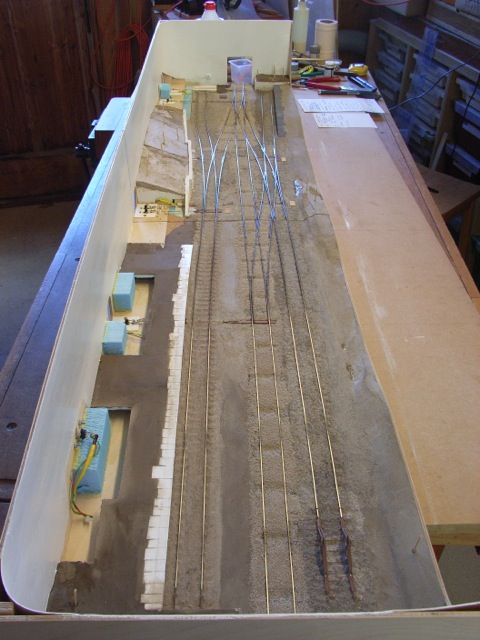
…and the ballast in place before the scenery was completed.

image

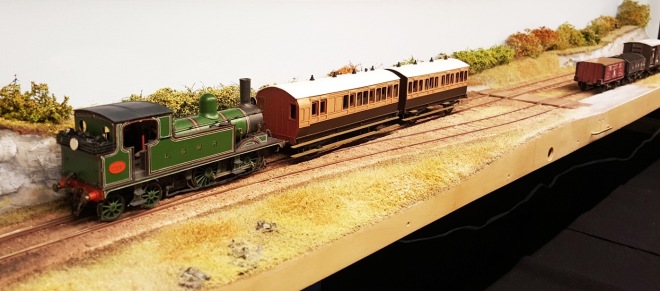
The layout on its early outing to Barnstaple, with mockup buildings finished with Derwent pencil colours and the B4 in nicklesilver.

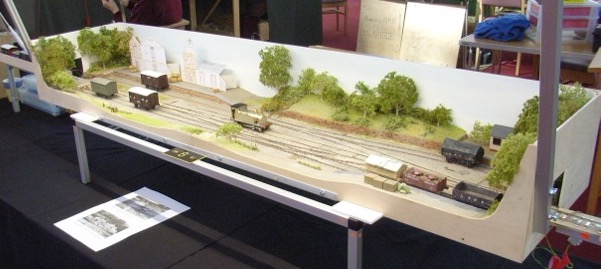
Because of the need to keep the amount of material to be carried to a minimum, the layout has no built-in legs. Even when it stands on the carrying frame it is rather lower than many modern small layouts (about 900mm from the ground depending on the tables provided) and is best viewed from a seated position.

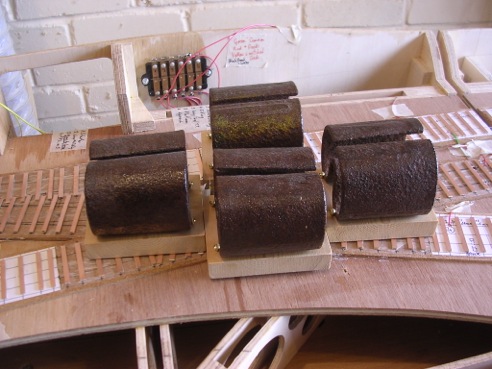
Four of the carrying frame components were originally used to make the lighting rig.  This can be seen in the St Albans picture below.  It used two floresent lighting strips of the under kitchen wall cabinet variety, that were rather bulky and heavy to carry.  For the trip to Utrecht these were replaced by a much more compact set of warm white LED strips supported on an aluminium channel, suspended on brackets fixed to the back of the layout.

The finished layout…

The guidebook says, “St Juliot’s Church is in an isolated position on the northern slopes of the Valency Valley. The church is snugly tucked away below the road, and for those with the time to spare, the walk through the woods from Boscastle is perhaps the best way to find this magical spot.”

No doubt today this walk would be along the “Valency Trail” that has replaced the railway from Boscastle to Otterham. Like the Bodmin and Wadebridge, this railway was built as an isolated line linking the wooded valleys along the North Cornwall Coast with the sea. It brought in sea sand to improve the land and took out slate, china clay and granite (perhaps for bridges or stone setts in London). By 1890 the LSWR had taken over operation from the original builders.

Most of the traffic is freight, but there is some evidence of passenger workings. The line is worked as ‘one engine in steam’, with the points at St. Juliot worked from a ground frame, released via a key on the train staff. Possession of the staff confers permission to work the branch – there is only one staff, and no tickets, so woe-betide the engineman who drops it in the creek! The locomotives are the smaller classes available to the LSWR and reflect the limited traffic and space.

(One of the above three paragraphs is a fiction!)

image

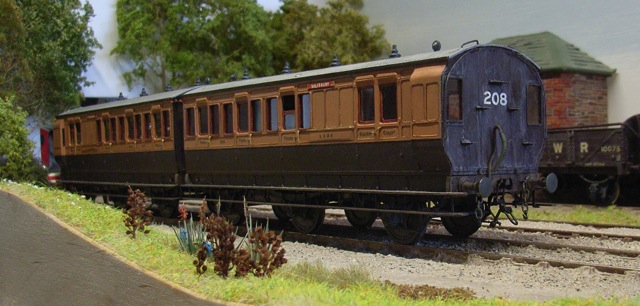
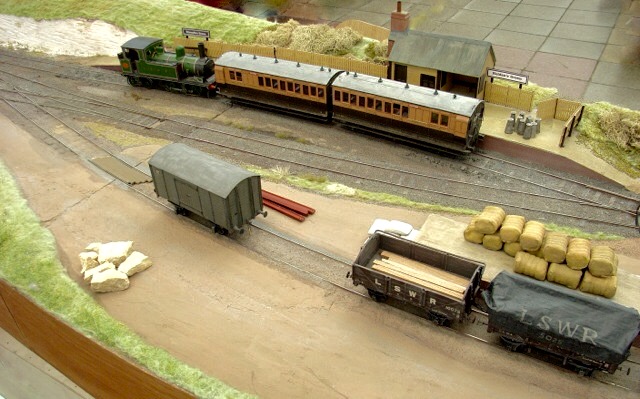
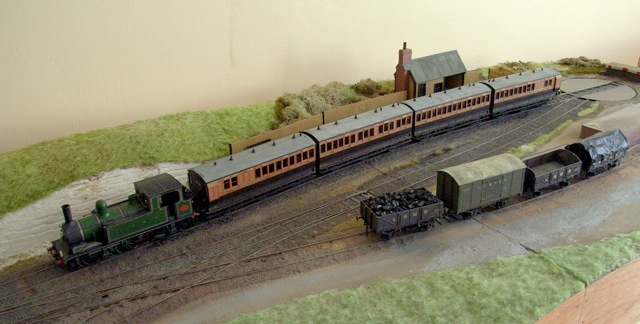
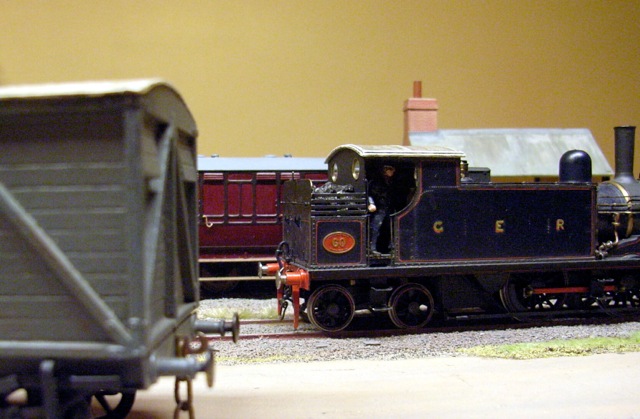
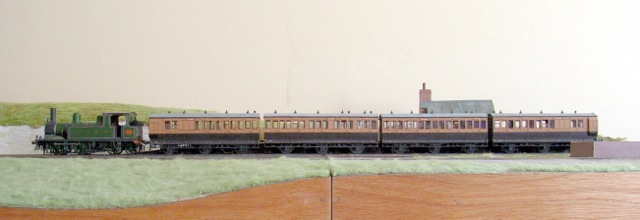
An early picture with a non-prototypical two coach (all third) set.  There is a temporary building in the background made from a surplus to requirement 7mm scale model of the signal box at Padstow.

image

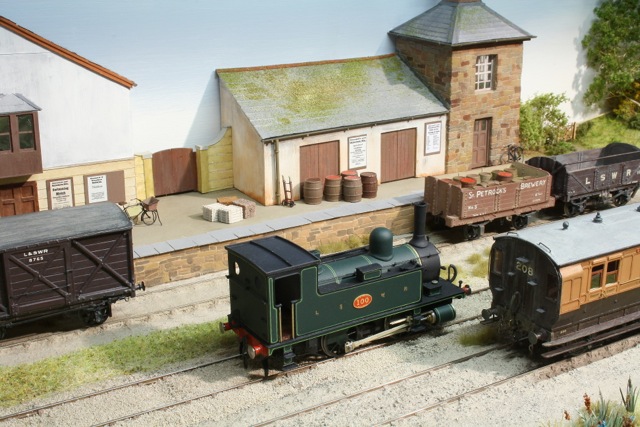
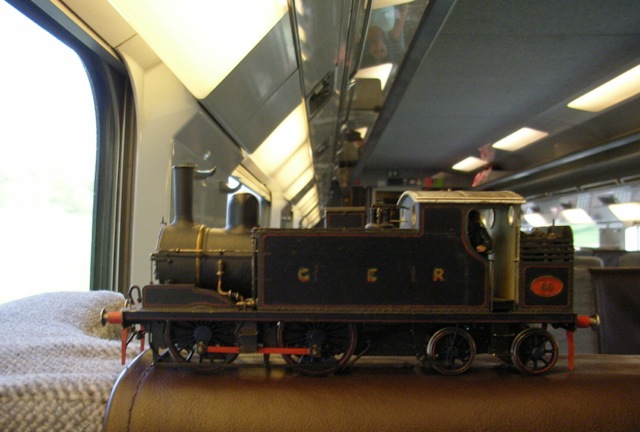
The LSWR B4 tank loco is a long way from its normal home in the docks at Southampton, although some did as far as Plymouth.  The LSWR livery helps create a unity of colour with a pallet of browns and stone colours along with a variety of greens.  The various elements of the layout are weathered with the same acrylic colours.  I must have a go at the B4 one day.  The buildings are loosely based on the original buildings of the Bodmin and Wadebridge.

image

The shunter seems to have left one link on the hook for some reason… It is a good idea to look more closely at what is being snapped by the camera. Otherwise a rather nice picture.

image

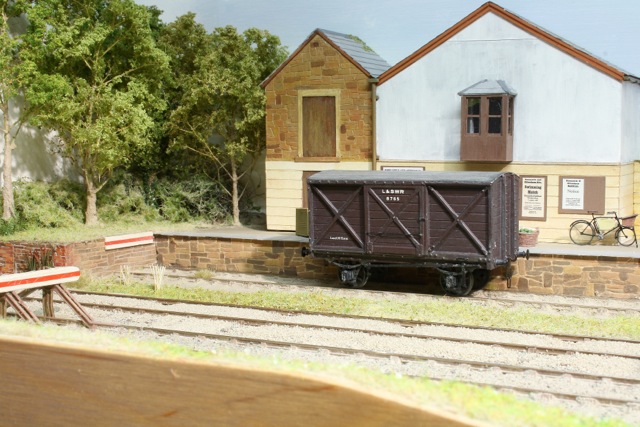
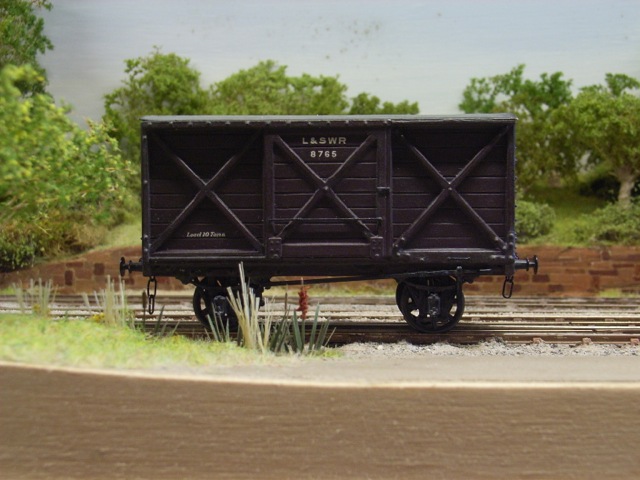
A lone van sits in the morning sun.

image

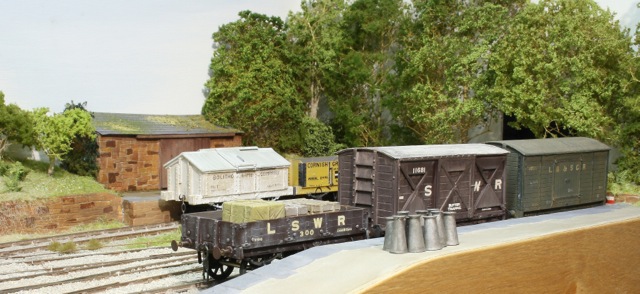
Both the mineral and general merchandise docks are full.  I assume the ‘Butter Traffic’ van has be pressed into service to pick up the milk churns.  The LB&SCR van is a long way from home.

image

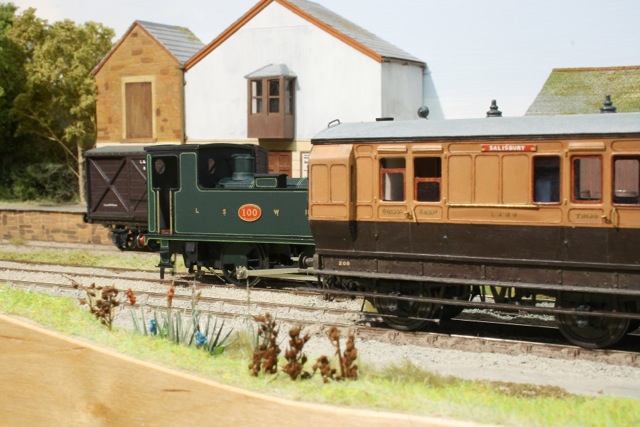
Not sure why the coach is displaying Salisbury.  Rather more probable than the other side of the set that displays Bournemouth.  The late Norman Pattenden originally built the four car set for use on a layout depicting the secondary line between the two places.

image

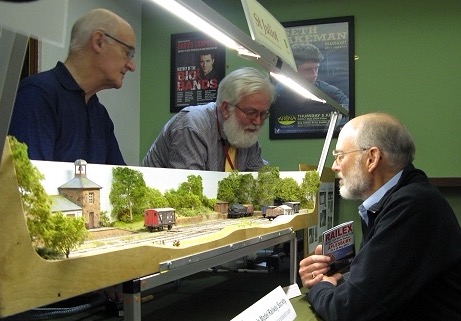
This is really a one-man layout, but it was a great pleasure to have Trevor Nunn enjoying himself at the controls at St Albans. It is good that the unknown spectator has taken the advice offered to sit down to view layout.

St Juliot was retired and passed to a 1/64th Scale modeller based in Cornwall, who hopes to set it up as a home layout.  It has been partly replaced by the even smaller Tresparrett Wharf, but another Cornish layout is planned for the crate at sometime in the future.


My First 1/64th Layout

STROUDLEY GREEN.

image

At the Exeter exhibition in 2007.

This was my first attempt to build a layout in 1/64th Scale. Initial construction was carried out in a relatively short period of about eight weeks before the Exe Model Railway Society’s exhibition in 2006. This work was characterised by a considerable amount of over-engineering, both of the based boards and the carrying trestles. Many useful lessons were learnt from the project. After several years on the modelling circuit the layout was disposed off to a fellow 1/64th modeller, the turntable removed and later, under its third ownership in as many years, the boards were stripped for new track work to be laid… I am not sure of its present condition or location.

However, the layout served its purpose for me. It got me back into layout building, acted as a testbed for various ideas that had been read about over several decades. Hopefully it also gave some pleasure to those who saw it at exhibitions and even to those who made the later alterations.

image

The layout in its nearly finished state, with the late Norman Pattenden’s train of LSWR six wheelers, a train that was too long for the fiddle yard.

The name “Stroudley Green” originated in my youthful interest in the LB&SCR. In the mid-60s I made some drawings of the old LB&SCR and LSWR joint station at Ashtead, shortly before it was replaced by a “Clasp” building. Instead of these drawings carrying the name of my home station on the running in board, it was inscribed with “Stroudley Green”, being part of the preparation for a proposed ‘00’ Southern layout. This project was scrapped after laying a considerable amount of 16.5mm fine scale track made from components obtained from Kings Cross Models. These involved bullhead rail carried by stamped brass chairs soldered to brass pins in wooden sleepers. While the construction method was good this track really did not stand up to visual scrutiny when compared to the developments in EM and later P4. The gauge was too narrow. With limited skills for gauge conversion, loss of heart and lack of time, my early career in railway modelling was abandoned.

The name “Stroudley Green” came back to mind as I was looking for a small experimental piece to work on before starting on a bigger project, Mellstock Intrinseca. The old drawings were found, but station buildings at Ashtead were too big for this Stroudley Green; so only an adaptation of the cycle shed was included on the layout. With the arrival of a number of items of Great Eastern rolling stock on loan for the early exhibitions, perhaps the layout should have been named “Holden’s Green”. Indeed a second name board was printed for use at St Albans in January 2007 as can been seen in one of the pictures on the exhibition website.

image

The early stages of  construction showing my first curved sided baseboards.  The hole for the turntable is already in place.

image

The same board with the curved back added and the beginnings of track building.  Note the wiring is already in place, a method that was replaced on later projects with droppers from each rail section. There were probably too many types of baseboard construction pushed into this limited space… Some not really suitable for a such a small layout. The quality and thickness of wood used (mostly out of the scrap box) was also not up to my later standards.

image

The main baseboard with the trackwork completed, including an experiment with a short section on blue foam, as per Iain Rice, rather than cork.  This method did not survive very long on this layout, but may be used on my future home layout to reduce noise transmission from the trains to the baseboard ‘drum’.

The track plan for this small layout has it origins in Bembridge on the Isle of Wight. It includes the defining feature of that little terminal station, the small turntable that provided the locomotive release. The plan has been altered by the inclusion of a kickback siding from the loop crossing the original siding by way of a diamond crossing. This made for more operational interest, be it the need to run round wagons during shunting or to use the chains for pulling wagons into the sidings. The latter is rather more fun!

The track was built in situ, with some code 75 flat bottom rail I had in stock from a possible 4mm light railway layout, the rail being soldered to 4mm cooper clad point timbers cut to sleeper length.

image

In the early days Trevor Nunn kindly loaned some rolling stock to avoid attending exhibitions with just one loco.  Here we seem to have an all GER scene.

image

Sometimes the transfer of stock was rather complicated.  After an exhibition with Trevor’s East Lynn in Berlin the E40 travelled home via Dresden and a trip that included travelling on several DB -ICs and as seen here, Eurostar.  Not too many GER locos have travelled across Europe at 180mph.

image

The resultant layout was 2340mm (7’8”) long, 510mm (1’8”) wide, with the board top at 1020mm (3’4”) when mounted on its exhibition trestles. The trestles and the stock are all that I have  left of the layout.

The name “Stroudley Green” may live again as I have plans for a 2mmFS layout that will more closely follow the original Bembridge track plan, but be small enough to fit into one of my carrying boxes.

image

I find these little weights made out of bullhead rail clips mounted on a small piece of wood very useful for weighing down bits of trackwork while it is under construction. Note the rather ancient switch block from H&M (the model firm not the high street store).


My route to modelling at 1/64th scale

image

Picture by Phil Copleston

In the late 1950s, when I was about seven years old, my father took me to a model railway exhibition at the Wimbledon Public Baths. One of the exhibits was the 1/64th scale layout based on the station at Swanage. While no trains ran, the layout and the associated display of rolling stock caught my eye. However, my father guided me away from it, saying, “You have to make everything yourself”. Brought up on a diet of the Railway Modeller, I was not fully aware of scratch building. I also did not realise that several leading modellers in the scale lived within a few miles of home.

During the 1960s I fiddled around with TT, running out-of-the-box Triang trains on home built track using fibre bases and spikes to hold down flat bottom rail. This was follow by working in 4mm, but being disappointed with the 16.5 gauge fine scale track built for a joint LB&SCR and LSWR layout, I drafted away from modelling. For the next forty odd years I followed various projects that came to nothing. Then I purchased one of Mr Bachmann’s tempting, new Southern Railway N class moguls. But I had fallen into a trap of going back to where I left off … 16.5mm track that just does not look right. Why should I mess about trying to convert this nice loco when I could spend the time starting from scratch?

I looked around at a number of scales and 1/64th came out on top. With some kind support I managed to get started, producing a number of layouts – ‘Stroudley Green’, followed by ‘St Juliot’. Along with these small layouts, the ‘Country Boards’ were built as a way into a larger project that would include a terminal station for both home and exhibition use. Progress was slow and distractions, both modelling and other, were too many.

During 2015 it was decided to concentrate on a terminal station, ‘Mellstock Intrinseca’, as a home layout and a number of smaller layouts, ‘Tresparrett Wharf’ for example, that can be taken to a few exhibitions travelling by train. This is something of a challenge at this scale.

My regrets are that I started late in modelling at 1/64th, but the enjoyment gained from working largely as a scratch builder is something to be treasured. It is never too late to start.

There is also a great pleasure in working in this ‘natural scale’* that is large enough to have significant mass, while not taking up excessive amounts of space. I also enjoy the challenge of working in the scratch building environment. My purpose here is to record progress on various of these projects and hopefully encourage others to have a go at 1/64th Scale modelling.

* The term ‘natural scale’ relates to the principle of the halves… 1/2, 1/4, 1/8, 1/16, 1/32, 1/64……